7 tips for converting your fluorescent tubes to LEDs
It flickers, it lasts, then it finally gets light: The good old fluorescent tube exudes the romance of industrial production halls, but in the meantime it has had its day. Converting fluorescent tubes to LEDs is the order of the day. This is because LED tubes have lower power consumption, are considered to be more environmentally friendly and even have a longer service life. But what about the ballast and starter? Can you really just swap the fluorescent tube for the LED?
On the one hand, LED tubes have numerous advantages over the old fluorescent tubes, but only a few disadvantages. On the other hand, a ban on the current T8 fluorescent tubes will come into force from August 25, 2023 anyway. That's why it makes sense to gradually have every single fluorescent tube converted to LED, or to tackle it yourself. LED tubes are extremely energy efficient compared to the old fluorescent tubes. So the power consumption decreases after the conversion. At the same time, the environmental impact is lower, because there is no mercury in the LED, whereas there is in the fluorescent tube.
Fluorescent tubes do not turn on immediately when the light switch is pressed. The initial flickering, accompanied by a more or less loud buzzing and cracking sound, lasts longer and longer over time: fluorescent tubes have a limited service life. Each on and off switching shortens the life of the fluorescent tube.
We are talking about a limited number of switching cycles over the life of the fluorescent tube. With the LED, this number of switching cycles is incomparably higher. The LED is therefore more durable than the fluorescent tube, which also contributes to higher environmental compatibility and ultimately a cost saving. The difference becomes apparent as soon as the lamp is switched on for the first time: The LED does not flicker and provides full brightness in less than a second (less than a second). The noise level is also reduced, because the ballast does not hum as loudly as the fluorescent tube.
However, there is one disadvantage if you want to convert from fluorescent to LED: the initial cost of the LED tube is higher than that of the fluorescent tube.
Replace fluorescent tube with LED: Consider the disadvantages of fluorescent tubes The high initial cost of LED tube and the cost involved in LED to fluorescent tube conversion is daunting at first. But are the costs really that high? If you compare the service life of LED and fluorescent tube and put this in relation to the purchase costs, the costs become relative again.
- And of course, the fluorescent tube has other disadvantages:
- The light output of the fluorescent tube is very low when switched on.
- Ballast provide again and again for flickering.
- The service life of the fluorescent tube is greatly reduced when switched on and off frequently.
- Environmental pollution is very high due to the mercury in the tube.
- The maintenance and disposal costs are enormously high for fluorescent tubes compared to the costs for LEDs.
As you can see: Converting fluorescent tubes to LED is not a question of trend or zeitgeist, but simply makes ecological, economic and legal sense. Your electricity savings will be around 70 percent for the same light output (depending on the length of the tubes, of course).
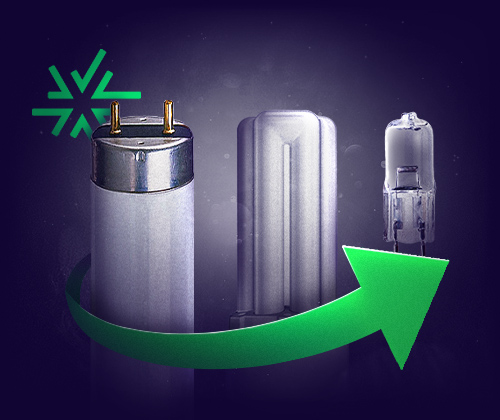
The most commonly used fluorescent tubes are of the T5 or T8 type. Smaller sizes can be found in mirror cabinets and in the form of under-cabinet lights, but they are rarer. The type is important for you to find the right LED tube. Today we associate fluorescent tubes with production facilities, industrial halls and workshops. However, we still often find fluorescent tubes in the home as well: They play an important role in garages and basements, hobby workshops and the like. Fluorescent tubes are used wherever large areas require uniform lighting. This is also the case in larger offices and commercial workshops. In general, you can replace fluorescent tubes with LEDs anywhere, as long as you pay attention to the right replacement. Because from the external appearance, the two light sources are very similar. You can find mechanically suitable LED tube for all types of fluorescent tubes. Pay attention to the base and the length: both must be identical!
If so much is the same and the two bulbs look the same - where are the differences (apart from the power consumption)?
Fluorescent tubes are filled with a noble gas called phosphor. When the light is switched on, the choke or the electronics in the ballast initiates an ignition voltage that ionizes the gas in the glass body. Therefore, the gas glows on the inner wall of the glass. LEDs are not filled with inert gas. INSIDE the tube there is a carrier board, which is equipped with LEDs in a row. These LEDs generate the light by emitting photons. This requires a low voltage, which is applied in the power supply and the LED driver.
The technical implications are therefore quite different. And for this reason, LED tubes do not require a ballast or starter. These components are not located in the fluorescent tube, but in the socket. So if you want to convert the fluorescent tube to LED, you should also convert the socket. In general, you can replace any fluorescent tube with LED - but you have to remove the ballast. It is not possible without a complete conversion. How exactly does the change from fluorescent tube to LED work? It depends on the type of ballast. Because here, over the course of many years, different systems have actually become established. There are three common types:
- CCG, the conventional ballast
- LLB, the low-loss ballast
- EVG, the electronic ballast
With the CCG you do not need to pay attention to anything if you want to convert the fluorescent tube to LED. You simply replace the tube with an LED tube. Replace the starter with a so-called dummy starter. This is a simple bridge that directs the current to the LED tube. With the VVG you proceed in the same way, you do not have to pay attention to anything else.
However, the electronic ballast works on a different principle. If you do not want to replace the entire socket together with the fluorescent tube, you must not use normal LED tubes. This is because the electronic ballast generates a high-frequency voltage that destroys the LED tube. There are special LED tubes that are ECG compatible. This is indicated by the manufacturer. If necessary, make sure that the LED tube is compatible with the electronic ballast. In this case, you do not need to worry about the starter at all, because there is no starter for an electronic ballast.
There remains one difficulty: You have to find out which ballast is installed. The easiest way to do this is to look for the starter. The starter is a small, round part that can be seen from the outside. This is because the starter looks out of the housing. However, it is sometimes located under the fluorescent tube. In that case, you won't see it until you remove the tube. In some cases, the starter is located on the side of the housing. No matter where you find the starter in the housing: If a starter is installed, your fluorescent tube works with KVG or VVG. You can simply replace the starter with a dummy starter and install a normal LED tube. If you don't find a starter, you need an electronic ballast compatible LED tube.
There is a second option: You can hire an electrician and have your fluorescent tube converted to LED without having to deal with the details yourself. Then, if necessary, the ballast is simply removed, because you do not need it for the LED tubes. In this case, you also do not need any ECG-compatible LEDs with a previously installed ECG, but use normal LED tubes.
Step 1: Analyze initial situation
Look at the lampholder and fluorescent tube: What type of fluorescent tube is installed? What does the socket look like, how long is the tube. Make a note of the information. Search the socket: Is there a starter? If so, make a note of it.
Step 2: Buy LED tube
You will need the information determined in step 1 when you buy the new LED tube. Make sure that the length, socket and compatibility are correct and get a dummy starter if necessary. If you have a professional convert the fluorescent tube to LED, ask what you get yourself and what is included in the power. Important to know: Conversions to electrical installations may only be carried out by qualified personnel anyway due to the existing danger to life from electric shock!
Step 3: Remove the old tube
Take out the fuse or turn off the main switch. Then remove the old tube and the starter from the socket.
Step 4: Insert new LED tube
Insert the dummy starter if necessary, then insert the LED tube. Turn it so that it is properly seated in the socket. Now you may switch on the main switch or the fuse again.
In ceiling louver luminaires, the fluorescent tubes are sometimes connected together in a tandem circuit. This means that one ballast operates two tubes. You can recognize this by the fact that two starters are installed on one ballast. Normal LEDs can not be used for such a tandem circuit, you should pay attention to compatibility! The manufacturers indicate if the LED tubes can tandem circuit.
Also pay attention to the amount of light. The lumen values are higher for fluorescent tubes than for LEDs. This is because fluorescent tubes emit light all around. LED tubes, on the other hand, emit light at an angle of 120 degrees. If you use a reflector, you can bring the light emission to the same values as with fluorescent tubes.
Another point concerns the light color, which is given in Kelvin. Early LEDs had the problem of emitting only cold light. This is no longer the case today, the light color can be influenced and can turn out quite warm. The higher the value in Kelvin, the cooler the light color. Fluorescent tubes usually have 840 or 965 Kelvin, which are actually always three-digit values. For LED tubes, the warm white light color for living rooms is equivalent to 3,000 Kelvin. Neutral white light of 4,000 Kelvin, on the other hand, is often suitable for offices and hallways. If you need daylight-like brightness in a workshop or garage, it should be 6,000 Kelvin.
- 1. In general, you can replace any fluorescent tube with LED.
- 2. Pay attention to the length and the socket of the tubes: Both must be identical if you want to convert the fluorescent tube to LED.
- 3. Pay attention to the ballast: starters must be replaced by dummy starters. If there is no starter, you need an ECG-compatible LED tube.
Retrofitting with WATT24
Also with the light reorganization it is called:
many ways lead to the goal!
We help you find the ideal replacement for your worn-out lighting solution - whether it's individual lamps or an entire lighting system.